Embroidery placement & hooping blankets
Osman Bayrak
EMBROIDERY PLACEMENT- BLANKETS: BABY, POLAR FLEECE, THROW, STADIUM BLANKET
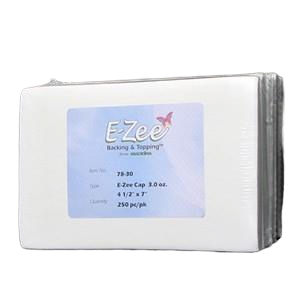
- Blankets normally have a good amount of stretch, but because they are a reversible item Tearaway backing and Solvy topping should be used instead of a cutaway backing.
- Framing the item upside down is highly recommended because of the size and bulk of most
blankets. - Solvy topping is needed for a cleaner finished product.
PLACEMENT CHART
| POSITION | Placement |
|---|---|
| Angled corner | Place center point 9”-11” down from corner, angled. Corner point should be placed at the 12 OÙclock position. |
| Bottom Edge | Centered near bottom edge of binding. |
SIZE CHART
| STYLE | Size |
|---|---|
| Script or Block Name | 19mm-37mm (3/4”-1½") |
| Script or Block Initials | 51mm-102 (2”-4”) |
HOW TO FRAME A BLANKET
STEP 1 |
Place 300 x 290 frame onto framing device. Loosen the frame thumbscrew slightly. |
STEP 2 |
The bottom right hand corner of blanket is the recommended placement for embroidery when angled. Lay garment flat and upside down, point of blanket should be at the 12 O'clock position. Measure down 9”-11 “mark center point of design with a pin. |
STEP 3 |
Select a piece of Tearaway large enough to cover entire frame. Lightly spray one side with Adhesive spray. Press backing onto center of wrong side of garment until fabric is laying flat. |
STEP 4 |
Lay blanket over framing device. Place your pin in the center of the frame. Lay Solvy topping over center. Make sure grain is straight and point of blanket is at the 12 O'clock position before pressing frame insert into place. You may pull the garment from top to bottom and side to side in order to straighten grain and pull out excess puckered fabric inside the frame. Tighten thumbscrew. The garment must be taut without being over stretched. |
STEP 5 |
Lift the frame out of the framing device. Handle garment by the outer edges of the frame, so as not to loosen the fabric tension of the framed garment. You are ready to attach frame to the machine. Remember the design must be rotated upside down prior to sewing. |
STEP 6 |
When the garment has completed sewing. You may pull away the Tearaway and Solvy backing. Small amounts of residual solvy will simply wash out after its first laundering. |
| Use a full piece of Tearaway backing instead of strips. The added strength of the full piece of backing with Adhesive spray will result in an overall better design with less distortion of lettering and designs. | |
|
|
| Framing any large item upside down is recommended whenever possible. This way the bulk of the material may lay in front of the machine. |


